

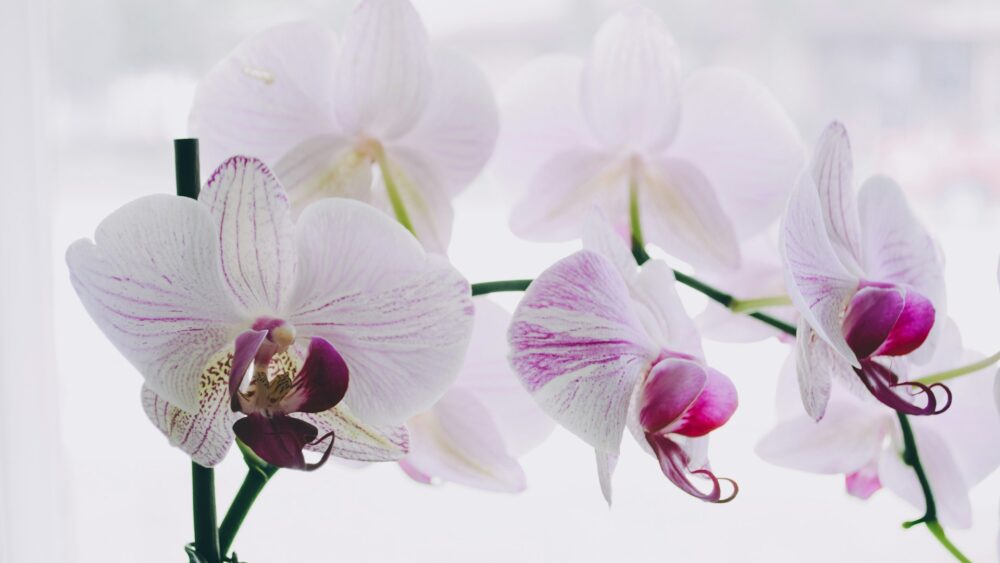
Orchid care runs on four rules: bright indirect light, water only when the roots tell you to, never plant one in regular soil, and feed weakly but regularly. Get those four right and the “difficult” plant with the dramatic reputation becomes one of the easiest things on your windowsill.
And that watering rule is less mystical than it sounds, because orchids come with a built-in moisture gauge. Look at the roots through a clear pot: plump and bright green means fully hydrated, leave it alone. Silvery gray means thirsty, water today. No schedule, no guessing, no moisture meter. The plant literally changes color to place its order.
That trick alone keeps most orchids alive, since soggy roots are the number one orchid killer. The rest of this guide covers what the care tags never explain: why the famous ice cube method deserves retirement, the one potting mistake that suffocates an orchid in weeks, what to do the day the last flower drops (it is not dying, and what you cut next matters), and the overnight temperature trick that flips the switch on a whole new round of blooms.
This is written for orchids indoors, specifically the Phalaenopsis (moth orchid) that makes up nearly everything sold at grocery stores and garden centers, and the fastest way to understand its care is to see where it came from. Sixty seconds of botany, and every rule below will suddenly make sense.
Meet Your Orchid: It Has Never Touched Soil
In the wild, a Phalaenopsis does not grow in the ground. It grows on the ground’s ceiling: clinging to tree bark under a tropical forest canopy, roots wrapped around the branch and exposed to open air.
That one fact explains the entire care sheet. Filtered light, because the canopy above it eats the direct sun. Airy bark instead of soil, because its roots evolved gripping a tree, drinking fast, and drying out, and packed dirt smothers them like a plastic bag. Watering in cycles of soak and dry, because rainforest weather is heavy rain followed by dry air. Humidity, because it is a tropical creature living in your heated living room.
Every section below is just a way of impersonating that tree branch. Starting with the skill that decides everything.
Watering: Read the Roots, Retire the Ice Cubes
Overwatering kills more orchids than every other cause combined, so this section carries the most weight in the guide.
The root-color gauge, in practice: grow the orchid in a clear plastic nursery pot (slip it inside a decorative pot if you like) and check the roots when you think about watering. Green and plump: fully stocked, walk away. Silver-gray: time to water. It is the single most reliable signal in houseplant care, and it self-adjusts for your home’s light, warmth, and season.
Rough rhythms if you cannot see the roots: bark-potted orchids want water about every 7 to 10 days, faster (3 to 7) in hot or dry rooms. Moss-potted orchids hold water longer: every 10 to 14 days, or 7 to 10 in dry homes. But treat these as sanity checks, not schedules. The roots outrank the calendar.
About those ice cubes: the “3 ice cubes a week” advice printed on orchid tags is popular because it is simple, not because it is good. A tropical plant meeting near-freezing water at its roots risks cold shock, and the melt often underwaters anyway. Use room-temperature water, roughly what is comfortable on your wrist, and water properly instead:
- Take the orchid to the sink and run room-temperature water through the pot: 15 to 30 seconds for moss, a few minutes (or a 5 to 10 minute soak, never longer) for bark.
- Let it drain completely. An orchid standing in a saucer of water is being slowly drowned.
- Wipe any water out of the crown, the central point where the leaves meet, because water pooled there causes crown rot, and crown rot is usually fatal.
- Every few waterings, flush generously, running about twice the pot’s volume through, to rinse out fertilizer salts before they crust on the roots.
One word on the water itself: orchids prefer low-mineral water. Rainwater, distilled, or filtered is ideal; soft tap water is fine. Very hard tap water leaves white mineral crust on roots and medium over time, and if you see that crust forming, switch sources.
Watering mastered, the next variable is the one that quietly decides if you ever see flowers, and it is also half the secret to how to keep orchids blooming year after year.
Light: Bright, Indirect, and More Than You Think
An orchid can survive in a dim corner for a long time. It will just never bloom there, and a healthy, green, flowerless orchid is almost always a light problem wearing a disguise.
The target is 12 to 14 hours of bright, indirect light. An east-facing window is the classic perfect spot: gentle morning sun, bright ambience all day. South or west windows work behind a sheer curtain, which turns harsh afternoon sun into canopy light. No good window at all? An inexpensive full-spectrum LED grow light genuinely does the job.
The leaves report on the lighting. True healthy Phalaenopsis foliage is a bright olive or grass green. Leaves gone dark, deep green and a bit limp are asking for more light (and explaining the missing blooms). Leaves bleaching yellow, or picking up a reddish, sunburnt tinge, are getting too much direct sun; pull the plant back or add the curtain.
And give it a quarter turn every few weeks so it grows even instead of lunging toward the window. One exception to the turning rule appears in the reblooming section below, and it matters.
Humidity and Moving Air: The Pair That Comes Together
Your orchid’s ancestors lived at 50 to 70 percent humidity. Your home in January, with the heat running, might sit at 20. That gap is behind two classic orchid heartbreaks: roots that dry to husks, and bud blast, where a spike full of promising buds shrivels and drops every one of them before opening.
Three fixes, in ascending power:
- A pebble tray: a shallow tray of pebbles and water under the pot (pot on the pebbles, above the waterline) evaporates a small humid microclimate around the plant.
- Grouping plants: houseplants exhale water vapor, and a cluster of them builds a shared humid canopy.
- A small cool-mist humidifier a few feet away, which is the reliable answer in genuinely dry climates.
But humidity has a rule attached: pair it with airflow. Damp, stagnant air around an orchid is a petri dish for fungus, mold, and rot. A ceiling fan on low, or a small fan aimed across the room rather than at the plant, recreates the breeze of that tree branch and keeps the moisture honest.
Temperature is the last environmental dial, and it hides the trick this whole guide has been building toward.
Temperature: Comfortable for You, With One Secret
If your home feels comfortable, your orchid agrees: 65 to 85°F by day and 55 to 70°F at night covers it. Keep it off freezing windowsills, and out of the direct blast of radiators and AC vents, because sudden temperature swings are the other trigger for bud blast.
Now the secret: the difference between day and night matters as much as the numbers. In nature, autumn nights running 10 to 15 degrees cooler than the days are the signal that tells a Phalaenopsis to start building a flower spike. Indoors, where thermostats hold everything flat, orchids never receive that signal, and that is why so many healthy orchids simply never rebloom.
Hold that thought. It becomes step one of the reblooming method below. First, the mistake that kills orchids faster than any watering error.
Never Use Potting Soil (The Fastest Way to Kill One)
Regular potting soil suffocates an orchid in a matter of weeks. Those air-loving tree-branch roots need oxygen flowing around them constantly, and dense wet dirt seals them off like shrink wrap, then rots them. It is the single most fatal mistake a new orchid owner can make, and the fix is choosing between two purpose-built media:
Orchid bark (fir or pine): maximum airflow and drainage, the closest thing to the ancestral tree. The tradeoff is more frequent watering, and bark breaks down over a couple of years. Choose bark if you enjoy tending your plants or your home runs humid.
Sphagnum moss: holds water like a sponge and stretches the time between waterings. The tradeoff is that it makes overwatering easy, and it compresses into a dense block over time. Choose moss if you are a forgetful waterer or your home runs dry.
Worth knowing: bagged “orchid mix” blends bark, moss, perlite and coco coir into a middle path. LECA (porous clay balls) offers bark-like airflow with bottom-watering convenience. And a small handful of horticultural charcoal mixed into any medium helps neutralize salt buildup and discourage fungus.
Whatever the medium, remember it is a consumable, which brings up repotting. But first, the two sections your keyword brought you here for.
How to Care for an Orchid After It Blooms
The flowers were glorious for two, three, even four months. Then they dropped, and this is the moment thousands of perfectly healthy orchids get thrown in the trash.
Your orchid is not dying. It is resting. After a bloom cycle, a Phalaenopsis enters a vegetative phase, six to nine months of quietly growing new leaves and roots and banking energy for the next show. Bare is not dead.
The immediate question is what to do with the leftover flower spike, and the spike itself tells you:
- Fully brown and dried: its work is done. Cut it off at the base of the plant.
- Still green but flowerless: it may have an encore in it. Cut just above a visible node (the small bump-ring on the stem), and a secondary branch of flowers sometimes grows from it.
- Still carrying buds or open flowers: touch nothing. Never cut an active spike.
Two hygiene rules for any cut: sterilize the scissors first with rubbing alcohol or a flame, because orchid viruses travel in sap from plant to plant, and dust the cut with ground cinnamon, a natural antifungal that seals the wound.
Then, through the rest period: carry on with normal light and the root-color watering rhythm, ease fertilizer back to about once a month, and watch the leaves. Firm and green means the rest is going well. Yellowing or going limp means a care problem, usually water, and the troubleshooting section below is your map.
Rest is what the plant needs. But you can also send it the wake-up call.
How to Get Orchids to Bloom Again
Reblooming is not luck. It is a sequence, and it works because it impersonates autumn in a rainforest.
- Give it cool nights. For several weeks, let nighttime temperatures fall to the mid-50s to low 60s°F: a cooler room, a spot nearer the window in autumn, anywhere the nights dip while days stay normal. This is the signal from the temperature section, and it is the master switch for spike production.
- Add a touch of drought. Once the leaves are mature, stretch the gap between waterings slightly for a few weeks. Mild stress whispers “season change” to the plant.
- Hold the light steady. Bright and indirect, every day. Resume light feeding when you see new growth.
- Watch the base of the leaves for the payoff: a small green tip shaped like a tiny mitten emerging from between the lower leaves. That is a flower spike being born. (Roots are rounded and grow downward; the mitten is flatter and reaches up.)
- The moment a spike appears, stop rotating the plant. A developing spike orients itself to the light, and moving the plant mid-build twists it into a corkscrew. The quarter-turn habit resumes after the flowers open.
- Support the spike as it rises with a thin stake and soft clips, adding clips loosely as it grows.
From mitten to open flowers takes two to three months. And once they open, ease off the fertilizer entirely, because pushing nutrients at a blooming plant shortens the flowers’ lives, which is the perfect segue to feeding done right.
How to Fertilize Orchids: Weakly, Weekly
Orchids are light feeders, and the growers’ rhyme covers the whole method: weakly, weekly. A diluted dose on a regular beat, never a strong one.
The method: dilute a urea-free liquid orchid fertilizer to one quarter of the label’s dose and apply it to moist roots only, never to a bone-dry plant, where concentrated solution burns the roots.
Match the formula to the season if you want the advanced game: higher nitrogen (like 30-10-10) through spring and summer growth, a balanced 20-20-20 anytime, and a high-phosphorus bloom formula (like 10-30-20) in late summer and fall to fuel spike development. A balanced formula year-round is a perfectly fine simple path.
The rest of the rules: monthly only during the post-bloom rest, none while flowers are open, and remember the periodic flush from the watering section, which rinses out the salts feeding leaves behind. Prefer minimal effort? Slow-release orchid granules feed for weeks per application. Prefer DIY? A popular natural recipe blends banana (potassium and phosphorus) with ginger tea (mildly antimicrobial).
Repotting: Every Year or Two, After the Show
Orchid medium is a consumable. Bark decomposes into mush, moss packs into a brick, and either way the roots lose their air supply and the medium turns acidic. Plan on repotting every 1 to 2 years, after blooming ends, or immediately if the medium has visibly broken down, roots are spilling wildly out of the pot, or the plant has gone top-heavy.
The condensed procedure:
- Sterilize your scissors. Slide the plant out of its squeezed, loosened pot.
- Strip away all the old medium and rinse the roots lukewarm.
- Trim everything dead, hollow, or mushy. Healthy roots are firm, in green, silver, or pale yellow.
- Soak the roots 10 minutes (crown above the waterline), then let the plant air-dry in a shaded spot for a day or two so cuts callus.
- Pot with the crown level with the rim, working fresh medium around the roots with a few taps to settle it. Go snug: orchids bloom best slightly pot-bound, and over-potting invites rot. Clear pots keep the root gauge visible.
- Wait 2 to 3 days before the first watering.
Then be patient: new root tips take 2 to 8 weeks, and the plant may take months to consider spiking again. Repotting is surgery, and recovery is part of the deal.
Troubleshooting: What the Plant Is Telling You
Wrinkled, leathery leaves: dehydration, from underwatering or from heat stress cooking the moisture out. Check the roots: silver or shriveled means water now and shorten the intervals.
Dark green, limp leaves on a plant that never blooms: not thirst, light hunger. Move it brighter.
Yellowing lower leaf, one at a time, occasionally: normal aging. Several yellowing at once: overwatering; let it dry out and recheck your rhythm.
Buds shriveling and dropping unopened (bud blast): a sudden environment shock: temperature swing, dry drafts, low humidity, or a move mid-spike. Stabilize the spot and humidity; the next spike will hold.
Mushy brown roots and a wobbly plant: root rot. The rescue is a full emergency repot: unpot today, cut every soft root back to firm tissue with sterile scissors, air-dry a day, repot in fresh bark, and water sparingly while it rebuilds. Orchids can regrow an entire root system from a bad start.
Black, mushy center where the leaves meet: crown rot, from water sitting in the crown. Caught instantly, drying the crown and dusting with cinnamon can sometimes save it; established crown rot is usually the end. This is why the wipe-the-crown step in watering is non-negotiable.
Cottony white fluff, shell-like bumps, or fine webbing: mealybugs, scale, or spider mites. Dab mealybugs with a cotton swab of rubbing alcohol, treat scale with horticultural oil, raise humidity and use insecticidal soap for mites, and check under leaves at every watering so populations never build. Quarantine any new plant for two or three weeks before it joins the collection.
The Cheat Sheet (Save This)
Screenshot this and keep your orchid for a decade.
Water: clear pot, watch the roots. Green = wait, silver = water. Room-temperature water, drain fully, wipe the crown, no ice cubes.
Light: east window or curtained south/west, 12 to 14 bright indirect hours. Dark limp leaves = more light. Bleached or reddish = less.
Air: 50 to 70 percent humidity (pebble tray or humidifier) plus gentle moving air, always together.
Medium: never soil. Bark for attentive waterers, moss for forgetful ones. Repot every 1 to 2 years, after blooming, crown level, snug pot.
Food: quarter-strength, urea-free, weakly weekly on moist roots. Monthly during rest, none while flowering.
After the blooms drop: brown spike, cut at the base. Green spike, cut above a node. It is resting, not dying.
To rebloom: several weeks of cool nights (mid-50s to low 60s), slightly drier, steady light, then do not move the plant once the mitten-shaped spike tip appears.
The Bottom Line
Taking care of orchids indoors is mostly the art of doing what the plant asks instead of what the myth insists. The roots announce the watering. The leaves grade the light. The spike tells you where to cut. Even the reblooming has a recipe: cool nights, a little thirst, and patience.
Impersonate a tree branch in a rainforest, and the plant that supposedly cannot be kept alive will bloom for you every single year, usually for longer than the relationship that first brought it into the house.