

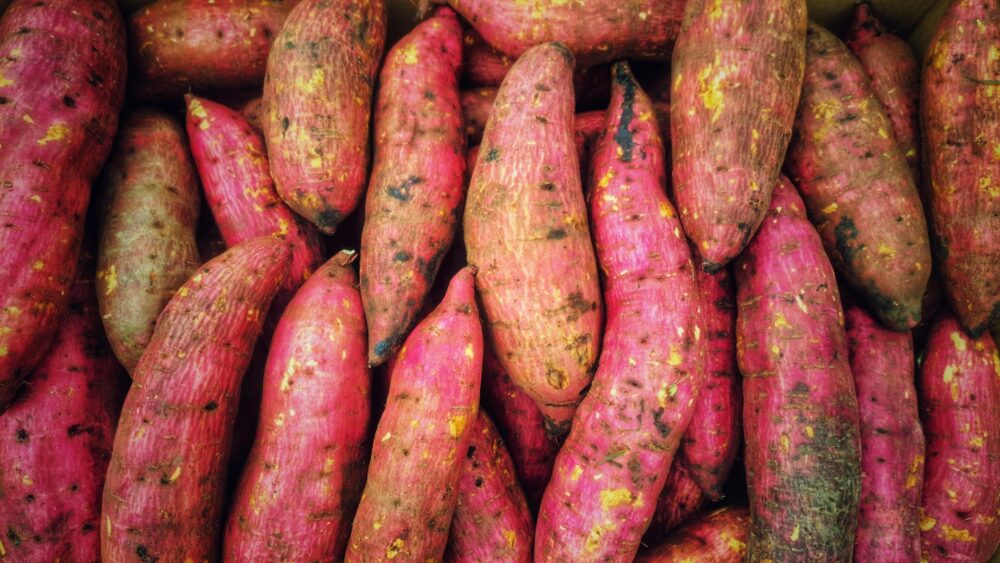
Here is the whole arc of growing sweet potatoes: suspend a single sweet potato in a jar of water, wait a few weeks while it sprouts baby plants called slips, plant those slips in warm, loose soil after the last frost, and dig up your harvest 90 to 120 days later. One potato from your kitchen can produce 10 to 20 plants, and each plant typically returns several pounds of tubers.
That is also the answer to how long sweet potatoes take to grow: 90 to 120 frost-free days in the ground, plus about 6 to 8 weeks of sprouting time before planting day. Start the jar in early spring, harvest in early fall.
But this crop breaks the normal gardening rules in ways that surprise even experienced growers, and the surprises are where harvests are won or lost. Sweet potatoes are planted from sprouts, not seeds. They will sulk or rot in soil that feels pleasantly cool to you. The signal that they are ready to dig is a skin test almost nobody knows. And the strangest one: a freshly dug sweet potato is not sweet. The flavor you know from the store is manufactured after harvest, in a step most home growers skip and then wonder why their crop tastes like starch.
All of it is below: the jar trick, the slip method, the planting rules, the exploding-keyword question of knowing exactly when to harvest, and the curing step that turns starch into sugar. Cheat sheet at the bottom. Start on the kitchen counter.
How to Grow Sweet Potato Slips (From a Sweet Potato)
Sweet potatoes do not grow from seed. They grow from slips: green sprouts that grow out of a mother sweet potato, each one a complete baby plant. Making your own is cheap, easy, and slightly magical to watch.
The jar method:
- Choose a firm, healthy sweet potato. Certified disease-free seed potatoes from a garden supplier are the gold standard; a grocery store potato can absolutely work too (more on that in a moment).
- Stick three or four toothpicks around its middle and suspend it in a jar of water, narrow end down, with the bottom half submerged.
- Park the jar somewhere warm, 75 to 80°F, in indirect light. Warmth is the accelerator here; a chilly windowsill stalls everything.
- Change the water every 2 to 3 days so it stays fresh.
- In 4 to 6 weeks, sprouts emerge from the top half and grow into leafy shoots. When a shoot reaches 6 to 9 inches, grip it at the base and twist it off cleanly.
Then give each slip its own head start: stand the twisted-off slips upright in a shallow container of water, and in 1 to 2 weeks each one grows its own inch-long roots. A pre-rooted slip hits the garden drinking and feeding from day one, while a bare-stem slip spends its first weeks just trying to survive. This one extra step meaningfully raises your success rate.
The store-bought question, answered honestly: yes, you can grow sweet potatoes from a grocery store sweet potato, and thousands of gardeners do. Two caveats: conventional store potatoes are sometimes treated with a sprout inhibitor, which makes them slow or reluctant in the jar (organic ones usually are not treated), and store potatoes carry no disease certification, so if a plant looks sickly, do not save its tubers for next year’s stock. If the store potato refuses to sprout after several weeks, the inhibitor is your culprit; try an organic one.
One sweet potato, 10 to 20 slips, several weeks of lead time. Which raises a question about all that water.
Can You Grow a Sweet Potato in Water?
Sort of, and the distinction matters, because this question splits into two different projects.
As a houseplant: yes, indefinitely. A sweet potato suspended in a jar grows a genuinely beautiful cascading vine, heart-shaped leaves and all, and it will live happily in water for months as long as you refresh the water weekly and give it decent light. Free, fast-growing, and honestly nicer looking than a lot of things sold at plant shops.
For an actual harvest: no. Tubers are storage roots, and they need loose soil to swell in. A vine kept in water spends its energy on leaves and stems and will never produce a real crop. Water is the maternity ward (for slips) and the display case (for the ornamental vine). Soil is where sweet potatoes are actually made.
One caution while we are on vines: the “sweet potato vine” sold at nurseries as a decorative annual, the chartreuse or deep-purple trailing plant in hanging baskets, is the same species but bred entirely for looks. Those ornamental varieties do form tubers, but small, poor-tasting ones. Grow the pretty vine for the porch and an eating variety for the table; do not expect one plant to do both jobs.
Slips rooted, expectations set. Now prepare the ground they are about to conquer.
The Soil: Loose, Sandy, and Slightly Acidic
Sweet potatoes are a root crop, which means the harvest is shaped, literally, by the soil it grows in. A tuber expanding through loose earth grows big and smooth. A tuber fighting compaction, rocks, or hard clay grows forked, twisted, and stunted.
The target: sandy loam that drains freely, with a pH of 5.8 to 6.2. Test the pH and adjust with sulfur (to lower) or lime (to raise) two to three weeks before planting.
The site: 6 to 8 hours of direct sun minimum, and not a bed that grew sweet potatoes, tomatoes, or peppers in the past three years, which starves out the soil diseases those crops share.
The prep:
- Clear all weeds, stones, and debris.
- Till or loosen 10 to 12 inches deep.
- Work in 2 to 3 inches of aged compost.
- Then build the signature sweet potato feature: raised ridges or mounds, 8 to 12 inches high, about 3 feet apart. Ridges drain freely, warm up faster in spring, and give tubers an entire hill of loose soil to swell into.
And if your ground is heavy clay: do not try to amend your way out. Build the ridges taller, or grow in raised beds, and bring in looser soil. Fighting clay with a bag of sand is a losing season.
Ground ready. The next decision, when to plant, is where cold-climate growers lose crops before they start.
When and How to Plant Sweet Potatoes
Sweet potatoes are tropical plants wearing a vegetable costume. Cold soil does not slow them down; it rots them at the stem. So planting day is decided by a thermometer, not a calendar.
The green light: soil holding 65 to 70°F at 4 inches deep, measured in the morning, for 4 consecutive days. A cheap soil thermometer removes all guesswork and pays for itself the first season. In shorter-season climates, cheat spring forward by laying black plastic mulch over the ridges 2 to 3 weeks early; it soaks up sun and warms the bed ahead of schedule.
Planting day protocol:
- Pick an overcast day, or plant in late afternoon, to spare the slips their first sunburn.
- Water the slips before handling, and handle gently; the roots dry out in minutes.
- Space slips 12 to 18 inches apart. Vining varieties get 3 to 4 feet between rows; bush types, 2 to 3 feet.
- Open a hole 4 to 6 inches deep in the ridge and lay each slip in at a slight angle, burying the lower two-thirds of the stem.
- Make sure at least two leaf nodes are underground. Every buried node is a potential tuber factory, and this small detail multiplies your yield.
- Firm the soil around the base and water thoroughly.
Then do not panic. Slips that wilt dramatically in the first day or two are not dying; that is a normal transplant sulk, and they perk up. If a late cold snap threatens within two weeks of planting, throw a cover over them overnight rather than starting over.
Choosing what to plant, briefly: Beauregard (90 to 100 days) is the dependable classic, Georgia Jet (90 days) the short-season champion, Jewel and Covington the long-storage picks, and Vardaman the compact bush type for raised beds and small gardens. Match the days-to-maturity against your frost-free window before you commit.
Planted. Now the season-long part, which is mercifully short to explain.
Water and Feeding: Two Windows, Light Touch
Sweet potatoes want steady moisture and modest food, and they punish excess in a very specific way: too much nitrogen grows a jungle of gorgeous vines over a bed of small, watery tubers. All leaf, no lunch.
The feeding plan: a phosphorus-leaning fertilizer like 5-10-10, or bone meal, worked into each planting hole, then one light, low-nitrogen side-dressing along the row at 3 to 4 weeks. After that, nothing unless a soil test demands it. Phosphorus builds tubers; nitrogen builds salad.
The watering plan runs on two critical windows:
- Window one, the first 2 to 3 weeks after planting: the slips are building root systems and have zero drought tolerance. About an inch of water a week, without fail. Miss this window and plants stunt permanently.
- Window two, mid-season through pre-harvest: the tubers are swelling underground, and irregular watering now is what causes cracked, forked, misshapen roots. Steady is the whole game.
- Then the taper: cut water back in the final 3 to 4 weeks before harvest. Wet soil late in the season swells tubers too fast, cracks them, and cracked tubers store terribly.
A straw or wood-chip mulch after planting holds moisture and cuts the watering workload. And once the vines start running, the plant takes over the mulching job itself.
Vines, Weeds, and the Three Pests That Matter
By midsummer a vining sweet potato patch looks like a green flood, and that flood needs light management.
Redirect the wanderers. Vines try to re-root wherever a leaf node touches soil, and every re-rooted node siphons energy away from the main tubers. Once every week or two, walk the patch and lift wandering vines back onto the bed. (In containers, train vines up a trellis instead; going vertical costs no yield.)
Weed early, then let the vines do it. Shallow cultivation between rows for the first 4 to 6 weeks, then the spreading canopy shades out most weeds on its own. A 2 to 3 inch mulch finishes the job.
The pest shortlist: the sweet potato weevil, whose larvae tunnel inside tubers invisibly until harvest and for which no treatment exists once established (certified slips and crop rotation are the only defense); black rot, a soil fungus causing dark sunken patches (remove and destroy affected plants); and root-knot nematodes, which fork and deform roots (resistant varieties are the answer). Deer and groundhogs, meanwhile, treat the vines as a salad bar and can strip a bed overnight, so rural gardens want a barrier or repellent.
Which brings the season to the question every grower googles in September.
How to Know When Sweet Potatoes Are Ready to Harvest
There is no flower, no fruit, and no color change on the part you eat, so harvest readiness confuses everyone. You are looking for two signals together, then confirming with a test.
Signal one: the calendar. Count from planting day using your variety’s days to maturity, 90 to 120 for most. Inside that window, start paying attention.
Signal two: the foliage. As tubers finish, the vines naturally yellow and begin dying back. Yellowing leaves inside the maturity window means the work underground is wrapping up.
Then confirm with a test dig: one to two weeks before your planned harvest, gently unearth a single plant at the edge of the patch. Check the size, then do the test almost nobody knows: rub the skin with your thumb. If the skin scuffs and peels easily, the crop is not ready. Mature tubers hold their skin. Immature skin slips off like wet paper, and thin-skinned tubers bruise, rot, and refuse to store.
And the deadline that overrules everything: soil below 55°F. Cold soil chills the tubers in the ground, causing internal discoloration and off flavors that no amount of curing can fix. Whatever the test dig says, the entire crop comes out before the soil drops below 55. In a wet autumn, consider going slightly early anyway, since heavy pre-harvest rain swells and splits tubers.
Harvest day protocol: clip the vines at the base a day or two ahead. Dig in dry conditions, with a garden fork (not a spade), inserted 12 to 18 inches out from the plant’s base, tilting slowly to loosen the whole hill before lifting. Then treat every tuber like an egg: the fresh skin tears at a touch, and every scrape is a future rot spot. Brush off soil by hand, do not wash them, never stack more than two or three deep, and move them to the curing space the same day.
Because now comes the step that creates the actual flavor.
Curing: The Step That Makes Sweet Potatoes Sweet
Here is the payoff of the promise from the top of this page. Dig a sweet potato and eat it that night, and it tastes bland and starchy, because it is. The sugars do not exist yet.
Curing is where the sweetness is made. Held warm and humid for about two weeks, the tubers convert starches into sugars, and simultaneously grow a thickened protective skin layer (the periderm) that seals every harvest scrape against rot. Skip curing and you get bland tubers that spoil in weeks. Cure properly and you get candy-sweet potatoes that keep for six months or more.
The conditions: 80 to 85°F and 85 to 90 percent humidity for 10 to 14 days, tubers in a single layer with space between them, and a small fan for gentle airflow. A bathroom with a space heater, a warm garage corner with damp towels, or any improvised warm-humid chamber works; a $10 thermometer-hygrometer combo takes out the guessing. The skin turning slightly thicker and more papery is success made visible.
Then storage: 55 to 60°F, humidity still high, in shallow crates or mesh bags with air moving between tubers. Check every couple of weeks and pull anything softening. And never refrigerate a sweet potato, cured or raw: fridge temperatures turn the flesh dark and hard-hearted in a way cooking cannot rescue.
One last move for next year: before the crop goes to storage, set aside a few medium, well-shaped, blemish-free tubers from your best plants as seed stock, labeled and stored in the same conditions. Your own best performers, re-selected each season, gradually become a variety tuned to your exact garden. Refresh with certified stock every 3 to 4 years to keep diseases from stowing away.
Quick Answers
How many sweet potatoes per plant? Typically 3 to 6 usable tubers, a few pounds per plant in good conditions. A modest row of 8 to 10 slips feeds a household for months.
Can I grow them in containers? Yes: a bush variety like Vardaman, a container at least 15 to 20 gallons, loose sandy mix, and vines trained up a trellis. Yields run smaller but real.
Sweet potatoes vs yams? Nearly everything labeled “yam” in a US grocery store is a sweet potato. True yams are a different plant entirely, starchy, white-fleshed, and rough-skinned.
Do they need full sun? Yes. 6 to 8 hours minimum. This is a tropical sun-lover, and shade shows up directly as shrunken yield.
Can I start earlier indoors? The slips already are your indoor head start: the jar runs on a countertop 6 to 8 weeks before planting day. There is no advantage to potting slips indoors beyond the pre-rooting step.
The Cheat Sheet (Save This)
Screenshot this and grow dinner.
Timeline: jar-sprout a sweet potato 6 to 8 weeks before last frost. Plant slips when soil holds 65 to 70°F for 4 days. Harvest 90 to 120 days later, before soil hits 55°F.
Slips: toothpicks, jar of water, warm spot. Twist off at 6 to 9 inches, pre-root in water 1 to 2 weeks. Organic store potatoes sprout; inhibitor-treated ones may not.
Planting: ridges 8 to 12 inches high, slips 12 to 18 inches apart, two nodes buried, angle the stem.
Season: inch of water weekly the first month, steady moisture mid-season, taper the last 3 to 4 weeks. Low-nitrogen feeding only. Lift re-rooting vines weekly.
Harvest test: yellowing vines inside the maturity window, then a test dig. Skin that rubs off = wait. Dig with a fork, handle like eggs, never wash.
The flavor step: cure at 80 to 85°F and 85 to 90 percent humidity for 10 to 14 days. Store at 55 to 60°F. Never refrigerate.
The Bottom Line
Growing sweet potatoes is a season-long magic trick with a two-week finale: one grocery-counter tuber becomes a jar of slips, the slips become a bed of vines, the vines quietly bury treasure, and the curing box turns that starchy treasure sweet.
Respect the warm-soil rule going in and the 55-degree deadline coming out, keep the nitrogen modest in between, and a single well-built ridge will feed you into February, with next year’s crop already waiting in a labeled crate.