
Growing garlic is planting in reverse: break a bulb into cloves, push each one pointy-end-up about 2 inches into the ground in the fall, mulch it, and mostly ignore it until early summer, when every clove you planted has quietly become an entire new bulb. From planting to harvest runs about 8 to 9 months, nearly all of it hands-off.
That fall date is the detail that surprises everyone, because garlic runs backwards from the rest of the vegetable garden. It does not merely tolerate winter; it requires one. A garlic clove needs weeks of cold to trigger the internal switch that divides it into a multi-clove bulb, and skipping that cold is the number one reason home garlic comes up as one sad round clove instead of a fat head. The full science, and the workaround for spring planters, is below.
Also below: the exact answer to when to harvest garlic (there is a leaf-counting rule, and both too early and too late genuinely cost you the crop), the secret second harvest that hardneck growers get in June and everyone else walks right past, whether the sprouting bulb in your pantry is trash or free seed stock, and the honest verdict on planting supermarket garlic.
Cheat sheet at the bottom. Start with the delightful math that makes garlic the best deal in gardening.
One Clove Becomes One Bulb (Choose Your Cloves Well)
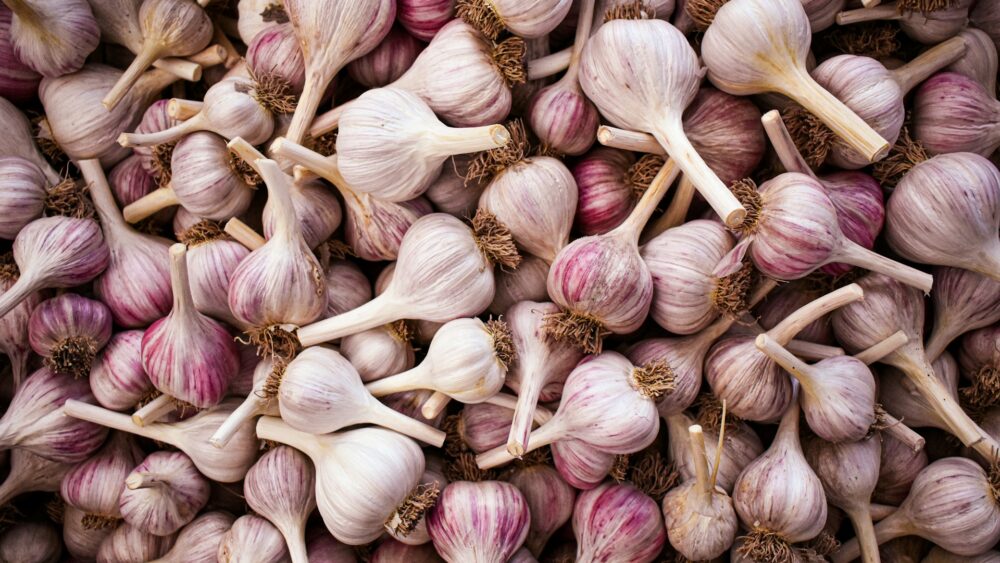
Every fat garlic bulb in your kitchen is really 8 to 12 seeds wearing one wrapper. Plant a single clove and it grows into a complete new bulb, which means one purchased head of garlic can return ten, and saving your best bulbs each year makes the crop self-funding forever.
What to plant: “seed garlic” from a garden supplier or farmers market is the gold standard: big, healthy, disease-free bulbs of a named variety suited to your region. Bigger cloves grow bigger bulbs, so plant the largest cloves from each head and cook the runts.
Can you grow garlic from store-bought garlic? Yes, with two honest caveats. Supermarket garlic is sometimes treated with a sprout inhibitor, which makes it slow or unwilling in the ground, and most of it is a softneck type grown for mild climates, which may underperform in a cold-winter garden. Organic store garlic (usually untreated) from a local source is a reasonable budget start; certified seed garlic is the reliable one.
Two prep rules: separate the bulb into cloves only a day or two before planting, since separated cloves dry out fast, and leave the papery skin on each clove. The wrapper is armor against soil rot, not packaging.
Cloves selected. Now the one fork in the road every garlic grower hits.
Hardneck vs Softneck: The 30-Second Decision
All garlic splits into two families, and the choice sets your climate fit, your storage, and one delicious bonus.
Hardneck garlic grows a stiff central stalk, thrives in cold-winter regions, and offers bigger, easier-peeling cloves with more complex flavor. It stores a respectable 4 to 6 months, and it produces the June bonus crop covered in its own section below: garlic scapes.
Softneck garlic is the supermarket type: no central stalk, better suited to mild-winter climates, smaller but more numerous cloves, and champion storage of 9 months to a year. Its flexible neck is what makes braided garlic possible, so if hanging a garlic braid in the kitchen is part of the dream, softneck is your plant.
The quick rule: cold winters, choose hardneck. Mild winters or maximum storage, choose softneck. (And a footnote for the curious: “elephant garlic,” with its giant mild cloves, is botanically a leek in a garlic costume. Grow it the same way, expect gentler flavor.)
When to Plant Garlic (Fall, and Here Is Why)
Plant garlic in the fall, about 4 to 6 weeks before the ground freezes: roughly September to early October in cold regions, October to November in moderate ones, and as late as December in mild-winter climates. The goal is for cloves to grow roots before winter without sending up much top growth.
The why is called vernalization, and it is the whole secret of garlic. Several weeks of soil temperatures below about 40 to 45°F flips a biochemical switch inside the clove that tells it to divide into a multi-clove bulb come spring. Winter is not something garlic survives; it is an ingredient. Fall-planted cloves wake in early spring with an established root system and the bulbing program fully loaded, and they spend the long days of May and June building the fat heads you are after.
Can you plant garlic in the spring? Yes, with managed expectations. Spring-planted garlic misses natural vernalization, so unchilled cloves usually grow one undivided round instead of a true bulb. The workaround: fake the winter by refrigerating your seed cloves for 4 to 8 weeks before planting as early in spring as the soil can be worked. You will still generally harvest smaller bulbs than fall planting delivers, and spring garlic also makes an excellent crop of green garlic, the scallion-like immature plant that chefs prize. Spring planting is a real option; fall planting is the right one.
How to Plant Garlic, Step by Step
- Pick a full-sun bed (6 to 8 hours minimum) with loose, well-drained soil, worked with an inch or two of compost. Garlic sitting in soggy winter soil rots, so heavy clay gardens should plant into raised beds or mounded rows. Skip beds that grew onions or garlic in the past couple of years.
- Separate the bulbs into cloves, skins on, biggest cloves selected.
- Plant pointy end up, flat root end down, 2 inches deep (3 inches in very cold regions for extra insulation). Upside-down cloves still grow, but they waste weeks U-turning underground and produce smaller, misshapen bulbs.
- Space cloves 4 to 6 inches apart, in rows 10 to 12 inches apart. Crowded garlic makes small bulbs; this crop earns its elbow room.
- Water once, well, to settle the soil and start root growth.
- Mulch 3 to 4 inches deep with straw or shredded leaves. The blanket moderates winter soil temperature, prevents frost from heaving cloves out of the ground, and suppresses spring weeds before they exist.
Then walk away. Green shoots may poke up in fall or late winter, and both are fine; the plant knows what it is doing. Your work resumes in spring.
Spring Care: Feed, Water, Weed, Stop
Garlic’s growing season asks for exactly four things, in order.
Feed early. When shoots are up and growing in early spring, side-dress with a nitrogen-forward fertilizer (blood meal, feather meal, or a balanced organic feed) and repeat once about a month later. The best fertilizer for garlic is really a schedule: nitrogen early, then stop feeding entirely by early May, because late nitrogen pushes leaves at the expense of the bulb you actually want.
Water like a steady rain. About an inch a week through spring while the bulbs size up, watering deeply rather than daily. Consistency here directly becomes bulb size.
Weed like it matters, because it does. Garlic’s skinny upright leaves cast no shade, so weeds grow uncontested and steal water and nitrogen all season. That thick mulch does most of the work; hand-pull whatever volunteers through it, shallowly, since garlic roots run close to the surface.
Then stop. Two weeks or so before harvest, cut off watering completely. Dry soil at the finish line tightens the bulb wrappers and starts the curing process in the ground, and bulbs dug from dry soil store dramatically better than ones pulled from mud.
Somewhere in June, if you planted hardneck, the plant will hand you a bonus, and most beginners throw it away.
Garlic Scapes: The Secret Second Harvest
In early summer, every hardneck garlic plant sends up a scape: a smooth, round flower stalk that rises from the center and curls itself into a loop like a green pig’s tail. This is the crop most first-time growers do not know they planted.
Cut every scape, and do it for two reasons. First, the bulb: left in place, the scape spends the plant’s energy on flowering, and removing it redirects everything downward, growing bulbs meaningfully larger, with research and grower experience putting the gain around 20 to 30 percent. Second, the kitchen: scapes are a delicacy, tender, mildly garlicky, and spectacular grilled whole, stir-fried, or blitzed into a pesto that people request by name.
When to harvest garlic scapes: once the stalk has made one full curl, sometimes two, while it is still tender, typically 2 to 4 weeks before the bulbs themselves are ready. Snap or snip each scape where it meets the top leaves. They keep for weeks in the fridge.
Softneck growers, no scapes for you, and no envy needed: your payback comes in storage life and braids. Either way, the main event is now only weeks out, and knowing the exact moment is the difference between a great crop and a mediocre one.
When to Harvest Garlic (The Leaf Rule)
Garlic gives no fruit, no color change, and no obvious announcement, so harvest timing confuses everyone, and the stakes are real in both directions. Dig too early and the bulbs are undersized with thin wrappers. Wait too long and the wrappers rot away underground, the cloves split apart, and the bulbs neither store nor impress.
The signal is in the leaves, and here is the rule: harvest when the lower third to half of the leaves have gone brown while the upper leaves are still green. In practice that is about 3 to 4 dead lower leaves on a typical plant. Each green leaf corresponds to a layer of protective wrapper on the bulb, so “half brown, half green” means the bulb is full-sized and still properly gift-wrapped.
By the calendar: fall-planted garlic typically hits that mark in June or July, with mild-climate and softneck crops running earlier and cold-climate hardnecks later. Softneck growers get a second tell: the floppy tops falling over signals maturity, the same signal onions give.
Confirm with a test dig: excavate one plant from the row’s edge and look. Fat bulb, distinct cloves visible through tight wrappers: go. Small and undivided: give the row another week or two and test again.
Harvest like it is fragile, because it is:
- Do not pull the tops. Fresh garlic necks tear right off, stranding the bulb underground. Loosen with a garden fork a few inches away from the row, then lift each bulb by hand.
- Brush off loose soil gently and do not wash the bulbs. Water invites rot into a crop that is about to spend weeks drying.
- Keep freshly dug garlic out of direct sun, which can scald the exposed bulbs, and move it straight to curing.
Because garlic, like a few other crops, is not actually finished at harvest.
Curing and Storing (Where the Shelf Life Is Made)
Fresh-dug garlic is alive, wet, and perishable. Curing turns it into the shelf-stable pantry staple, and it is nothing more than controlled drying.
Cure: lay the whole plants, leaves, roots and all, in a single layer on racks or screens, or bundle and hang them, somewhere warm, dry, airy, and out of the sun: a garage, covered porch, or shed with a fan is ideal. Leave them 2 to 4 weeks, until the necks are papery-dry and the outer wrappers rustle. The bulb pulls its last nutrients from the drying leaves during this stretch, which is why the tops stay on.
Trim and store: cut the stalks an inch above the bulb (or braid your softnecks first, which is done while the leaves are still pliable, then hung to finish), trim the roots, and store bulbs somewhere cool, dry, dark, and ventilated: mesh bags, baskets, or open crates at roughly 50 to 60°F. Not the refrigerator, whose cold-and-humid interior reads as “winter is over, sprout now” to a garlic clove.
Expect hardneck to hold 4 to 6 months and softneck 9 to 12. And before anything gets cooked, set aside your biggest, best bulbs as next fall’s seed. Replanting your own top performers every year builds a strain tuned to your exact garden, and it is the step that makes garlic a crop you buy once and grow forever.
Growing Garlic in Pots (And the Truth About Indoors)
Garlic grows happily in containers, with three requirements: a pot at least 8 inches deep (12 is better) with drainage, quality potting mix, and the same fall-to-summer outdoor timeline as the ground crop. Plant cloves 2 inches deep and 4 inches apart, mulch the surface, and leave the pot outside all winter, because that cold is the vernalization the bulbs cannot skip. In brutally cold regions, huddle pots against a sheltered wall or wrap them, since roots in containers run colder than roots in the ground. Water when the top inch dries, and follow the same spring feeding and summer harvest rules as the bed.
Growing garlic indoors is a different, smaller promise. A windowsill cannot supply the months of cold plus the long outdoor season a bulb demands, so indoor garlic will not make heads. What it makes, generously, is garlic greens: plant cloves in a pot of soil an inch deep, give them your sunniest window, and snip the green shoots like scallion-flavored chives for months.
The same honest answer covers growing garlic in water: a clove suspended in a shot glass of water (or a sprouted one stood in a jar) grows tasty green shoots for weeks, and no bulb, ever. Water and windowsills grow garnish. Soil, cold, and a season grow garlic.
That Sprouting Garlic in Your Pantry? Plant It
A bulb going green-shooted in the pantry is not garbage. It is volunteering.
If it is fall, or close: break it into cloves and plant them exactly per the steps above, green shoots and all. A sprouted clove is simply a clove with a head start, and it settles into the fall schedule perfectly.
If it is the wrong season: pot the sprouted cloves for windowsill garlic greens per the section above, or refrigerate the bulb for a few weeks and try an early-spring planting with the fake-winter trick. Worst case, sprouted garlic is still fine to eat: the shoot turns bitter, so slice cloves and flick the green core out, and cook as usual.
Quick Troubleshooting
Yellow leaf tips in spring: common and usually minor, pointing to nitrogen hunger (feed), a cold snap (wait), or waterlogged soil (drainage). Widespread yellowing of whole young plants is the one to take seriously.
Small bulbs at harvest: the usual suspects in order: planted too late in fall (roots never established), insufficient cold (mild winter or spring planting without refrigeration), crowding, weed competition, or scapes left on hardnecks.
One round clove instead of a divided bulb: the vernalization signature. The clove never got its weeks of cold. Eat it (rounds are perfectly good garlic) and plant on time this fall.
Rusty orange spots on leaves: garlic rust, a fungal disease of damp, crowded plantings. Remove the worst leaves, improve spacing and airflow next season, and rotate the bed.
Bulbs split open with wrappers rotting: harvested too late. Next year, trust the leaf rule over the calendar.
The Cheat Sheet (Save This)
Screenshot now, plant in the fall.
Plant: fall, 4 to 6 weeks before ground freeze. Biggest cloves, skins on, pointy end up, 2 inches deep, 4 to 6 inches apart, full sun, then 3 to 4 inches of mulch.
Types: hardneck for cold climates, big cloves, and scapes. Softneck for mild climates, braids, and 9 to 12 months of storage.
Spring: nitrogen feed early, stop by May. Inch of water weekly, ruthless weeding, then no water at all the final 2 weeks.
Scapes (hardneck): cut at one full curl, eat them, gain bigger bulbs.
Harvest: when the bottom third to half of leaves are brown and the top is still green, usually June or July. Fork, don’t pull. Brush, don’t wash.
Cure and store: whole plants, warm airy shade, 2 to 4 weeks, then trim and keep cool, dry, and dark. Never the fridge. Save the best bulbs to replant.
Spring planting or sprouted pantry garlic: refrigerate cloves 4 to 8 weeks to fake winter, expect smaller bulbs, or grow greens indoors.
The Bottom Line
Garlic is the garden’s best background process: one October afternoon of pushing cloves into dirt, a winter of doing nothing, a spring of light chores, and a June morning when every clove has become a whole bulb, with a scape harvest thrown in as a tip.
Plant in fall, trust the leaf rule in summer, cure it patiently, and replant your best. Do that once, and you may never need to buy garlic, or seed garlic, again.