

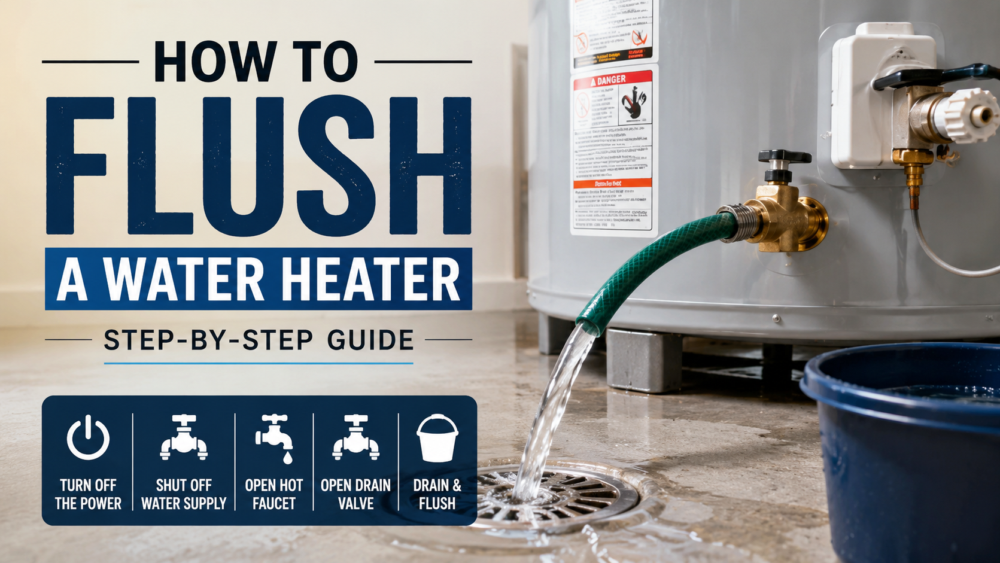
Flushing a water heater is a five-part job: cut the power, shut off the cold supply, run a garden hose from the drain valve, open a hot tap to break the vacuum, and drain until the water runs clear. Done annually, it takes under an hour, costs nothing, and can roughly double the life of the tank.
The reason is sediment. Hard-water minerals, mostly calcium and magnesium, settle into a layer at the bottom of the tank. That layer buries the heat source, so the heater burns more energy to make less hot water, and the popping and rumbling you may already hear is steam forcing its way up through the crust. Left long enough, the sediment eats the tank lining, the tank leaks, and a leaking tank cannot be repaired, only replaced.
But before you touch a valve, read the next section, because there is one situation where flushing a water heater can cause the leak you are trying to prevent, and most guides bury that warning under step nine. There is also a mistake at the refill stage that can destroy the heating element in seconds, a fix for the drain valve that clogs mid-flush, and the reason your tank may refuse to drain at all (it is the same physics as a finger over a straw).
The steps below work identically for gas and electric units, and for every tank brand: Rheem, A.O. Smith, Bradford White, all of them. And however you phrase the job, flush a hot water heater, drain a hot water heater, clean a water heater, empty the tank, it is all the same procedure. Cheat sheet at the bottom. First, the warning.
Read This First: When NOT to Flush
Here is the counterintuitive truth about old tanks.
If your water heater is 5+ years old and has never been flushed, a flush can trigger a leak. In a long-neglected tank, sediment sometimes settles into and plugs microscopic cracks in the lining. Stir all that sediment loose and you can unplug those cracks, and the tank that was quietly holding on starts weeping.
So check the age first. Look at the data sticker on the tank. If the year is not printed outright, it is encoded in the serial number, usually in the first four characters. Not sure? Search the brand name plus “serial number date code.”
Then pick your lane:
- Under 5 years old, or flushed regularly: do the full power flush below. It is the most effective method.
- 5+ years and never flushed, or rust visible around the tank: either do a gentle gravity-only drain (skip the agitation bursts in Step 7) or leave the tank alone entirely and put your money toward the eventual replacement. A gravity flush pulls less sediment but will not shock a fragile tank.
Lane chosen? Gather five minutes of supplies.
What You Need
- A garden hose, long enough to reach a floor drain, utility sink, driveway, or bucket. Shorter drains faster.
- A flathead screwdriver or adjustable wrench for the drain valve. Some valves turn by hand.
- A bucket, ideally clear plastic, because judging when the water runs clear is the whole endgame, and clear sides make it obvious.
- Optional but handy: rubber gloves (the water starts hot), a wet/dry vacuum for a clogged valve, and a cheap threaded drain-valve cap in case the valve drips afterward.
Now the flush itself, ten steps, start to finish.
Step 1: Turn Off the Power
A water heater that fires with an empty tank destroys itself, so the power goes off before anything drains.
Electric water heater: flip the breaker at the panel. That is the whole step.
Gas water heater: turn the thermostat dial to Pilot or Vacation mode. Both stop the burner from firing while keeping the pilot lit, which saves you relighting it later. Off works too if you know your relighting procedure.
Optional comfort move: the tank is full of scalding water right now. If you are not in a hurry, open a hot tap somewhere and wait an hour or two for the tank to cool before draining. Gloves cover you if you skip the wait.
Step 2: Shut Off the Cold Water Supply
Two pipes meet the top of the tank: cold in, hot out. You want the cold one, usually the right side as you face the unit, sometimes color-coded blue, always the pipe that feels cool.
Lever handle: turn it perpendicular to the pipe.
Round gate valve: turn it clockwise until it stops, and be gentle. Old gate valves are brittle, and forcing one is how a flush becomes a plumbing call.
Step 3: Connect the Hose to the Drain Valve
The drain valve is the spigot near the bottom of the tank. Unscrew its cap if it wears one, thread the garden hose on clockwise, and run the other end to your drain point.
Two rules for the hose run: the outlet end must sit level with or below the drain valve, and the hose must slope downward the whole way. Water will not drain uphill, and a long flat run drains at a crawl. (Need to push water up a slope or across a yard? A small inline hose pump, around $45 online, solves it.)
And mind where it dumps. This water comes out hot enough to scald, so keep kids and pets away from the outlet, and know that some HOAs and local codes restrict draining into the street.
Step 4: Open a Hot Tap to Break the Vacuum
Put a finger over a straw and lift it: the water stays put. Your water heater is the straw.
Open the hot side of a nearby faucet, a bathtub is best because it lets in the most air, and leave it open for the whole job. Air enters the system, pressure equalizes, and the tank can actually drain. Expect gurgles, hisses, and sputters from that faucet as the tank empties. That is the sound of it working.
Step 5: Open the Drain Valve
Towel under the valve first, then open it.
Most common is a brass valve with a slotted stem: a quarter turn with the flathead so the slot runs parallel to the outlet. Handle-style valves turn parallel to the spout, and round plastic handles turn counterclockwise by hand.
Water should start moving through the hose immediately. Now the tank empties, which takes anywhere from 15 minutes to an hour depending on size and sediment. Watch the hose outlet, and meet the two problems that stall a drain.
Step 6: If the Tank Won’t Drain (Or Slows to a Trickle)
The drain valve sits at the lowest point of the tank, exactly where the sediment lives, so the sediment sometimes clogs the very valve meant to remove it. Signs: flow drops to a dribble, the tank still feels heavy, or a knuckle-tap on the lower tank lands with a dull thud instead of a hollow ring.
Three fixes, easiest first:
Poke it loose. Close the valve, detach the hose, and slide a stiff wire (a straightened coat hanger works) into the valve opening to break up the blockage. Reattach and reopen fast, or keep a bucket under it.
Suck it out. A wet/dry vacuum pressed onto the drain valve opening pulls the clog out from the outside. This is the move that beats stubborn blockages.
Blast it from inside. Skip ahead and run Step 7’s cold-water burst with the drain valve open. The incoming spray often knocks the clog free from behind.
If the drain stalls for a different reason, with no clog, the vacuum has re-formed somewhere. Open a second hot tap, or carefully lift the TPR valve lever (the safety valve on the side with the pipe running down it) to let air in from the top. Only do that once the water level is well below the TPR valve, or it will spit hot water.
One tip that saves your floor: before ever detaching the hose mid-job, close the drain valve and shut every open faucet to re-form the vacuum. That vacuum is what keeps the remaining water in the tank instead of on your floor.
Tank empty? Now the part that separates a flush from a mere drain.
Step 7: The Power Flush (Stir and Repeat)
Gravity draining removes loose sediment. The compacted layer at the bottom needs to be stirred up, and the cold supply line is your stirring tool, because it runs down a dip tube to the bottom of the tank.
- With the drain valve still open, open the cold supply valve for 10 to 15 seconds. Cold water blasts the tank floor and churns the sediment into suspension.
- Close the supply and let the tank drain again.
- Watch what comes out at the bucket: cloudy water, flakes, grit. That is years of mineral buildup leaving.
- Repeat the burst-and-drain cycle until the water runs completely clear in the bucket. Two or three rounds is typical; a neglected tank can take more.
(This agitation step is exactly what the never-flushed 5+ year tank from the first section should skip. Gravity lane: drain once, gently, and move to Step 8.)
Step 8: Close the Valve and Pull the Hose
Water running clear? Close the drain valve firmly, unthread the hose, and watch the valve for a minute.
A drain valve that seeps after use is common and cheap to solve: a threaded brass cap (a few dollars) screws over it and stops the drip. A valve that leaks steadily even capped is telling you to replace it, a $20 to $30 part and a straightforward job for another day.
Step 9: Refill the Tank COMPLETELY Before Restoring Power
This is the step that wrecks water heaters when rushed, so here is the rule in one line: water first, power second, no exceptions.
- Open the cold supply valve fully.
- Leave that hot faucet from Step 4 open. It vents the air out of the tank as water pushes in.
- Watch the open faucet: it will sputter and spit air, then run steadily. A steady, full stream means the tank is full.
- Only then close the faucet.
Fire an electric element in a half-empty tank and it burns out in moments. A gas burner dry-firing is just as unkind. The full tank is the protection.
Step 10: Power Back On and Check for Leaks
Electric: breaker on. Gas: thermostat back from Pilot to your normal setting (around 120°F is the standard safe-and-efficient mark).
Then a thirty-second inspection: the drain valve, the cold and hot connections up top, and the TPR valve if you opened it. Dry all around? You are done, and hot water is back within the hour.
That is the full flush. Three quick companion topics finish the picture, starting with the question everyone asks next.
How Often Should You Flush a Water Heater?
Hard water: once a year, and twice a year if your area’s water is heavily mineralized. Soft water, or a home with a water softener: every 2 to 3 years is enough.
The stakes are bigger than efficiency. A neglected water heater typically lasts 10 to 12 years before the tank leaks and forces replacement. A regularly flushed one, with its anode rod maintained, can run 20 years or more. One hour a year is buying years of appliance.
Signs the tank is overdue right now: popping, rumbling, or banging sounds (steam punching through the sediment layer), hot water running out faster than it used to, a creeping gas or electric bill, cloudy or discolored hot water, or falling pressure at the taps.
The Anode Rod: The Other Half of the Job
While you are in a maintenance mood, know about the anode rod. It is a sacrificial metal rod inside the tank that corrodes on purpose, so the steel tank does not. When the rod is gone, the tank starts rusting instead.
Rods last roughly 3 to 5 years, less in hard water. Replacing one means loosening the large hex nut on top of the heater and swapping the rod, with one big caveat: on an older tank where the rod has never been touched, the threads are often seized, and forcing them can damage the tank. Same philosophy as the flushing rule: on an old, never-maintained unit, be gentle or leave it be.
Tankless Water Heaters Are a Different Job
No tank means no sediment pile, but tankless units scale up inside their heat exchanger instead, and they get descaled rather than flushed: a small pump circulates food-grade white vinegar through the unit’s isolation valves for 45 to 60 minutes, dissolving the mineral scale.
The concept is simple, but the valve hookups and pump kit make it its own procedure, and manufacturers like Rinnai and Navien each have their own steps. If your unit is tankless, look up the descaling procedure for your specific model rather than adapting this guide.
DIY or Pay a Pro?
A flush is one of the most DIY-friendly jobs in home ownership: no special tools, no plumbing disassembly, nothing pressurized beyond a garden hose. Plumbers typically charge somewhere in the range of $100 to $200 for the same hour of work.
Where a pro earns the fee: a tank that will not drain even after the clog fixes above, a drain valve or gate valve that is corroded shut, any active leaking from the tank body (that is a replacement conversation, not a flush), or a tankless descale you would rather not rig a pump for.
The Cheat Sheet (Save This)
Screenshot before you head to the utility closet.
First: tank 5+ years old and never flushed? Gravity drain only, or leave it alone. Otherwise proceed.
The flush: power off (breaker, or gas dial to Pilot) → cold supply off → hose on drain valve, downhill run → open a hot bathtub tap → open drain valve → drain → 10-15 second cold-water bursts, drain, repeat until clear.
Clogged valve: wire poke, wet/dry vac on the valve, or a cold-water burst from inside.
Refill: cold supply on, hot tap open until it runs steady with no sputter, THEN power on. Never power a part-full tank.
Schedule: yearly for hard water, every 2 to 3 years for soft. Anode rod every 3 to 5 years, unless it has never been touched on an old tank.
Call a pro: tank leaking from the body, valves seized, or roughly $100 to $200 if you would simply rather not.
The Bottom Line
Flushing a water heater is an hour of unglamorous work that pays like an investment: quieter mornings, faster hot water, a smaller energy bill, and years added to a machine that costs four figures to replace.
Put it on the calendar for the same weekend every year, keep the water-first-power-second rule sacred, and your water heater will outlive every appliance in the house.